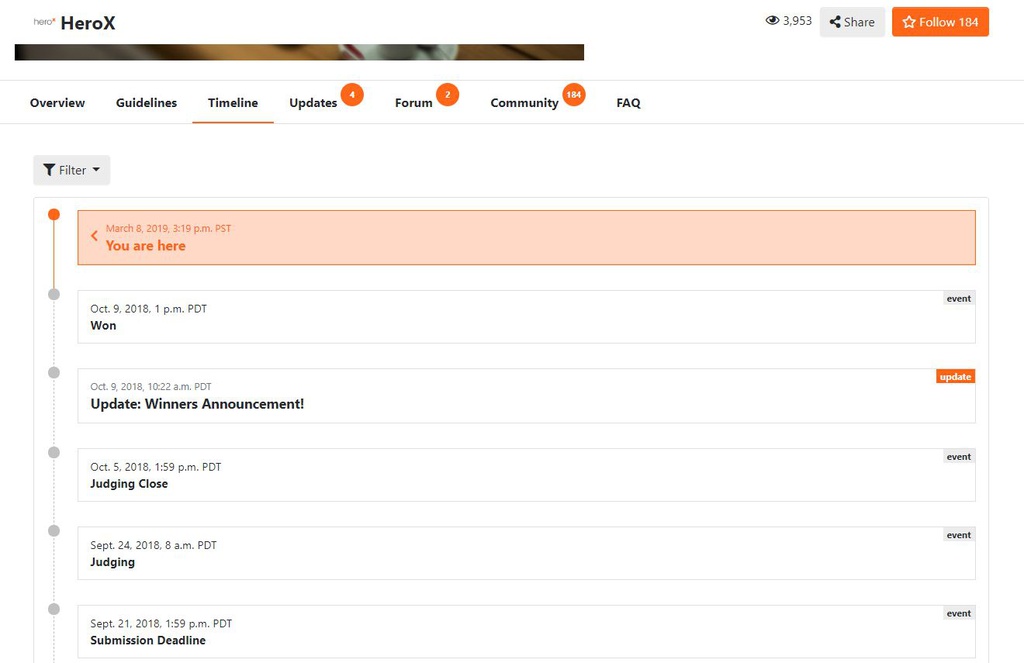
The Timeline section allows you to display the schedule on your HeroX page (see next page for a visual). Setting these milestones also triggers key functions on the platform (see below).
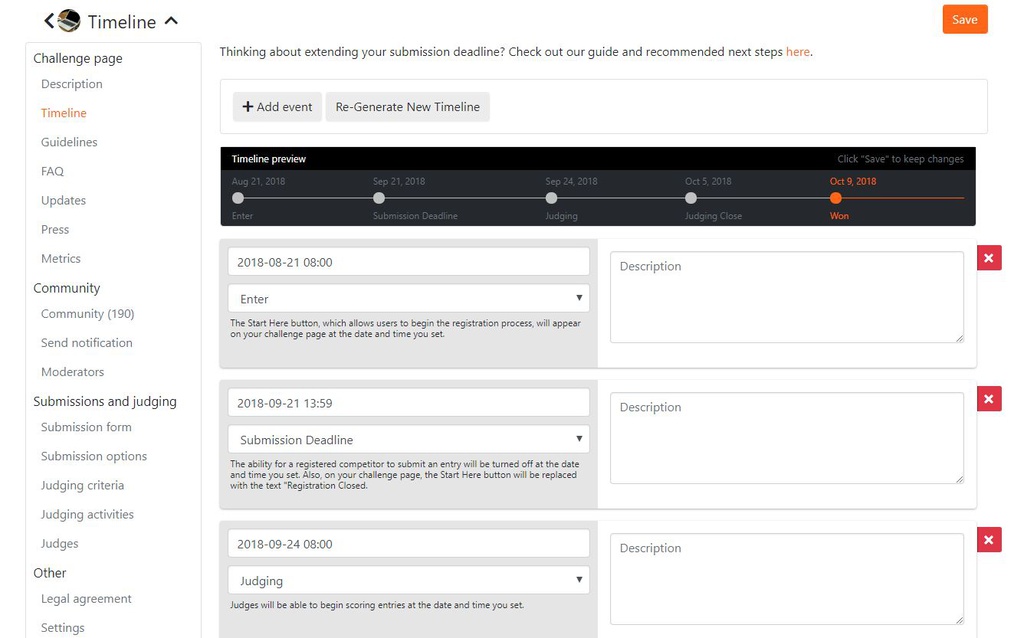
To create your Timeline, click the “add event” button. Select the date using the calendar in the date field; set the time of the event using the sliders beneath the calendar. Select the event type from the pull-down menu to the right of the date field; select a pre-defined event from the list or choose “Other” to create a custom event (if you choose “Other” a new field will appear for you to enter a title for this event). If desired, enter additional details or descriptions for the event; this text will appear in the “Timeline” section of your HeroX page.
Repeat the steps above to add as many events as are needed. When finished, click the “Update Timeline” button at the top of the page. You can update your events after you add them, however, once the date and time have passed for any given event, you will no longer be able to update that event.
Following is a list of the event types that automatically trigger certain features on the HeroX platform:
Once you create a timeline for your crowdsourcing project, it will appear in a new tab titled “Timeline”. See below for an example: